

I am officially on the sourdough train!
Oh how I’ve missed out on all the years of my life when I wasn’t making my own sourdough bread at home… oh well, I’m certainly making up for lost time now 🧑🍳 🍞
I am pretty new to this and I’m no expert, but below I share with you the recipe that I have been using. I found several similar ones online when I first started researching how to make sourdough, and this is what I landed on and have been successfully using to make my oh-so-delish bread.
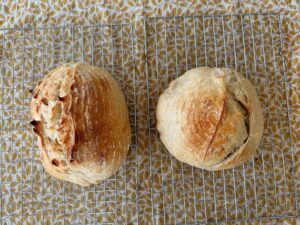
In case you’re wondering if homemade sourdough is ‘healthier’ or easier on the gut than store-bought…
YES it most certainly is!
Slow-fermented homemade sourdough bread is a gut-health game changer compared to standard, rapid-rise store-bought loaves. During its long fermentation process, wild yeast and beneficial bacteria naturally “pre-digest” the heavy wheat proteins, breaking down complex gluten into simpler amino acids that are significantly easier on your digestive system.
This slow process also degrades phytic acid—a natural anti-nutrient found in grains—which unlocks vital minerals like magnesium and iron so your body can actually absorb them. Ultimately, this traditional method transforms simple flour into a highly bioavailable, gut-friendly food that delivers exceptional nutrition without the bloating caused by highly processed factory bread.
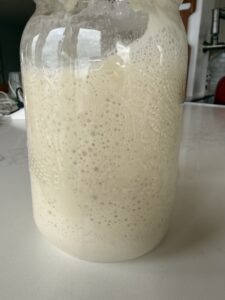
Scroll to the end of this blog for instructions on making your own sourdough ‘starter’ (aka the ‘mother’)…
ps: I actually had tried to make my own starter back several months ago when I first got into this. I probably wasn’t patient enough, but I ended up getting a great ‘mother’ from a friend at the gym – so that’s what I’ve been using.
I’ve also included nutritional values at the end too. You’re welcome 🤓
Sourdough Bread Recipe
Heads up – this is a timely process, but a simple one. The actual time required to work the dough is super minimal, it’s the waiting time that the dough is just sitting there doing its wonderful fermenting that makes this process span over 2-3 days. It can feel daunting when you first do it, but honestly it’s so easy!
Also – know that there is ALWAYS an alternate way if the timing doesn’t work for you. I’ve had to disrupt the following process many times – I just ai it and have always found options for ‘re-arranging’ the process to make it work for me. And my bread still always turns out amazing!
Step 1: Feed your starter
Here are the official instructions, the ones I followed for the first little while I started making sourdough (below is what I now do successfully):
- Take 50 grams from the starter that is stored in a 32 ounce glass mason jar in your fridge. Use a digital kitchen scale to set a new clean glass jar on, and zero out the scale. Then add 50 grams of the starter.
- Add 50 grams of room temperature/luke warm water and mix well (it doesn’t all have to be completely dissolved).
- Add 50 grams of all-purpose flour, mix well.
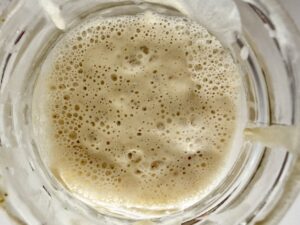
- Cover lightly with a cloth and let it sit at room temperature for at least 6-8 hours until it grows and expands quite a bit. Some sources say it needs to double in size, but the growth size is less important than the bubbling. You want some expansion, but more importantly, you want more bubbles in it. It’s often recommended to do this just before bed because it’ll ferment and get bubbly over night and be ready to go in the morning. You can put an elastic band around the glass jar to indicate the level at which it started – that way you’ll be able to tell how much it’s grown in size.
- Note: some sources say to put this in the oven with the light turned on, others say not to do this. I’ve always done it and it seems to work well. It’ll generate just enough heat in there to make a cozy warm environment that supports the fermentation.
Here’s what I do now instead of the above – same jar, same day:
- instead of removing 50 grams of the starter and putting it in a new jar to feed, I just use the actual jar of starter I have in the fridge, and add the 50 grams of room temp water + the 50 grams of flour directly to it, and mix it all up (note: if I accidentally go a little over 50 grams of water when I’m pouring it in, no biggie. Just be sure to put the same amount of flour in).
- now proceed as above, with letting it sit covered with a cloth for a few hours to ferment and start bubbling nicely – note: I don’t do this at nighttime anymore because sometimes it fully ferments within only a few hours, and then starts losing some of its bubbles by morning time. So now I simply do it as soon as I wake up, which for me is about 6-7am. Then let that fed starter sit in my oven with the light on for about 4 hours. This is usually plenty long enough for it to get bubbly enough to start making the dough, with enough time still left in the day to get through the next phase of actually making of your dough.
- Doing it this way saves me an extra day in the process, and saves me another dirty jar to clean up. I recommend you try both ways and see what works best for your schedule/timing needs.
Step 2: The actual ‘Dough Making’
- Once your starter has been ‘fed’, is fermented and nice and bubbly, you’re ready to use it to make your bread dough.
- In a clean bowl, measure out 100 grams of the bubbly starter (if you used a separate jar with a measured 50 grams of starter to begin with, this 100 grams of fed starter should be about all of it). Note: I’ve used a good 150 grams before (oops the pour got away from me!) and my dough was still great.
- Add 300 grams of room temperature/luke warm water and mix (again, doesn’t have to be all completely dissolved).
- Then add your flour – the amount varies a little depending on the type of flour you’re using.
- bread flour: use 450 grams
- all purpose flour (better priced and still works beautifully, this is what I use): use 475-490 grams
- Then add 10 grams salt.
- Stir to mix, it may have some dry’ish chunks still, that’s okay. Cover with a tea towel and let rest on counter (or in oven with the light on) for 30 minutes.
30 minutes later: Stretch & Folds x3
- After 30 minutes and while still in the bowl, you’ll gently stretch the dough and fold it over onto itself. Rotate the bowl a quarter turn and stretch and fold again. Do about 4-6 of these folds, then cover and let rest again for another 30 minutes.
- Do this 3 times.
First Rise:
- After the third stretch and fold, move the dough to a new clean glass bowl that you’ve rubbed or sprayed with a little olive oil. Place the dough in smooth side up (honestly not a big deal how you place it if you can’t tell smooth side from the other!)
- Cover with saran wrap to seal it. Let rise at temperature again (or in the oven with the light on) for 5-8 hours until the dough has doubled in size. Note: I use the oven with light on method, and often I find that the temperature inside the oven actually gets quite warm over this long of a time period – so I will usually turn the oven light off after about 3-4 hours. My dough has usually doubled in size and ready for the next step after about 5 hours.
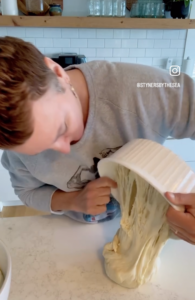
Pre-Shape:
Depending on how long it took for your dough to double in size, we’re now about 6.5-9.5 hours into the process on the ‘working’ day.
- Once your dough has doubled in size, remove it from the bowl and place it on an unfloured counter top, smooth side up.
- Cup and turn the dough around the outer edges to form a tight ball of dough; you can add a little flour if the dough is too sticky to work with).
- Then leave it in place on the counter, uncovered, to rest for 30 minutes.
Final Shape & Second Rise:
We’re now at 7-10 hours into the process on the dough-making day.
- Dust your banneton basket lightly with flour.
- Dust the top of your dough with a little flour; flip it over so the floured side is against the counter.
- Pull the four corners out so that the dough forms a square shape, then fold into thirds from the outside in. Then roll from one edge into a log or oval shape. Smooth the ends by tucking the flaps under and gently shape your new loaf.
- Place the dough into the basket with the seam side facing up, smooth side down.
- Cover with tea towel and let rise for 1 hour at room temperature (or oven with light on).
Cold Proof Overnight:
Voila, after 8-11 hours, you now have your sourdough loaf!
- Place the covered dough, still in the basket, into the fridge and let cold proof overnight (or for 6-24 hours).
Baking Day!
- Preheat oven to 450 degrees for at least 30 minutes with your dutch oven (with lid) in there. Put a baking pan on the rack underneath (it helps hold the heat evenly).
- While the oven is heating, take your dough out of the fridge, release it from the basket and drop onto parchment paper on your counter (so the top is now the bottom). Dust off any excess flour.
- Score down the middle of the dough ball from end to end; this gives the bread a controlled escape hatch for steam.
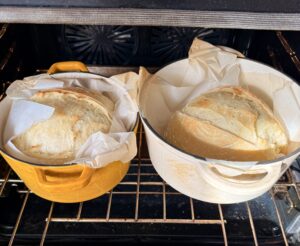
- Once the oven has preheated, remove the hot dutch oven. Pick up the piece of parchment paper with dough on it, and carefully place into the dutch oven (yes, the parchment paper goes in there).
- Cover with the lid and bake in oven for 20-25 minutes. Then take the lid off and bake for another 15-20 minutes. Internal temperature of bread should be 205 degrees F when finished.
- Cool for at least 1 hour on a wire or slatted rack on the counter before cutting into.
- NOTE: my mom’s old trick – while still hot out of the oven, rub the bottom and top of the loaf with a little butter to soften the crust just a little; makes it much easier to cut!
Making your sourdough starter or ‘Mother’
Calling a sourdough starter the “mother” (or the “mother dough”) is a time-honored baking tradition that goes back centuries. The name comes from the fact that this single, living organism acts as the biological parent to every single loaf of bread you will ever bake from it.
Making your own sourdough starter is incredibly simple, but it requires one main ingredient: patience.
You don’t need to buy wild yeast because it already lives naturally on the hulls of grain and right in the air of your kitchen. Your job is simply to create the environment to trap it and grow it.
All you need is unbleached flour (whole wheat or rye work best to start, but unbleached all-purpose works too), filtered water (chlorine in tap water can kill the good bacteria), and a clean glass jar.
Here is the step-by-step daily guide to bringing your starter to life:
Day 1: The Initial Mix
In your glass jar, combine exactly cup (60 grams) of flour and cup (60 grams) of lukewarm water. Stir vigorously with a fork or spatula until no dry flour remains. Scrape down the sides of the jar. Cover the jar loosely with a lid or a cloth secured by a rubber band (it needs to breathe a little). Let it sit on your counter in a warm spot () for 24 hours.
Day 2: The First Discard & Feed
You might see a few tiny bubbles, or you might see absolutely nothing. Don’t worry.
-
Discard: Throw away half of your mixture (about ). Why? If you don’t discard, by Day 7 you will need a bucket of flour to feed the sheer volume of starter.
-
Feed: Add a fresh cup of flour and cup of lukewarm water to the jar. Stir thoroughly, cover loosely, and let it sit for another 24 hours.
Days 3 to 5: The “Fake Out” Phase
Repeat the exact same process as Day 2 at roughly the same time every day: Discard half, then add 1/2 cup flour and cup water. * Note: Around Day 3, your starter might suddenly puff up massively and smell a bit funky or sour. This is usually a surge of “bad” bacteria fighting for dominance. Keep feeding it! By Day 5, the good lactic acid bacteria will take over, the smell will sweeten into a pleasant, fruity, yeast-like aroma, and the activity might temporarily slow down.
Days 6 to 7: Establishment
Keep up the daily discard and feed cycle. You should now start seeing the dough reliably double in size within after you feed it, showing a bubbly sponge-like texture throughout the jar.
How to Tell When It’s Ready to Bake (The Float Test)
Once your starter is consistently doubling in size within a few hours of a feeding and looks completely riddled with bubbles, it’s time to test its strength.
Gently drop a teaspoon of your active starter into a glass of room-temperature water. If it floats on the surface, it is trapped full of carbon dioxide gases and is officially strong enough to bake a beautiful, stretchy loaf of bread! If it sinks, it just needs a few more days of daily discarding and feeding to mature.
OR… get a little established starter from a great friend 😊
Nutritional Values:
Based on your loaf making 12 slices of bread – per slice:
- 149 calories
- 30 grams carbs
- 1.5 grams fibre
- 4 grams protein
- 0.5 gram fat
In case you’re wondering (like I did)…
-
Over a 12-to-24-hour fermentation, the microbes in your sourdough consume a small percentage of the carbohydrates and convert them into carbon dioxide gas (the bubbles you see!) and organic acids.
-
Because of this, the actual net carbohydrate count and caloric density of your finished sourdough slice will be slightly lower than the raw math suggests (just taking the value of 490 grams of flour and dividing by 12). It isn’t a massive drop (usually around a 5–10% reduction in simple sugars), but it is enough to significantly lower the bread’s glycemic index, preventing the blood sugar spikes associated with standard white bread.
- In raw all-purpose flour, a tiny bit of fat—about 4.8 grams total, or just 0.4 grams per slice—comes entirely from the germ and the endosperm of the original wheat berry.
I hope you enjoy your sourdough as much as we do in my home 🥰
Be the first to get all new recipes when you play along in the RxGRIT nutrition challenge app – check it out here!


The entire contents of this website are based upon the opinions of Build Holistic Nutrition. Please note that Build Nutrition is not a dietitian, physician, pharmacist or other licensed healthcare professional. The information on this website is NOT intended as medical advice, nor is it intended to replace the care of a qualified health care professional. This content is not intended to diagnose or treat any diseases. Always consult with your primary care physician or licensed healthcare provider for all diagnosis and treatment of any diseases or conditions, for medications or medical advice, as well as before changing your health care regimen.

© BUILD NUTRITION 2026. ALL RIGHTS RESERVED. PRIVACY POLICY



Go ahead, creep us on social. You know you want to!